- Learn about the project
- Set up prerequisites
- Set up the project in your computer
- Add Increments (+ commit, tag, push):
Level-0,Level-1,Level-2,Level-3before next lecture
1 Learn about the project
- Read the following two sections, if you haven't done so already:
Admin iP - Overview
The objectives of the individual project (iP) is to learn/refresh the basics of,
- Java
- OOP
- IDEs
- Git and GitHub
- Project automation tools
- Code quality
The iP is very similar to the project you did in TIC2002 but with the following differences:
- Faster pace: You'll need to finish the project within 6 weeks.
- Better tools: You'll be using industry-strength tools more e.g., use an IDE instead of repl.it
- Higher rigor: You are expected to follow a more systematic process e.g., using Git and GitHub more.
- Higher bar: The code quality is expected to be higher and the functionality should be more robust e.g., required to follow some code quality guidelines.
If you didn't do well in the TIC2002 project, this is another chance for you to catch up and level up your skills in preparation for the team project that is coming up later.
If you did well in the TIC2002 project, use this as an opportunity to stretch yourself and improve your skills further e.g., go beyond the minimum requirements, try different design options
All skills you will learn in the iP will be useful in the team project (tP). Furthermore, some of the iP code can be adapted for the tP.
The more you do in the iP and farther you push beyond the minimal expectations, the easier it will be in your tP.
The iP is based on the generic project called Project Duke, the overview of which is given below.
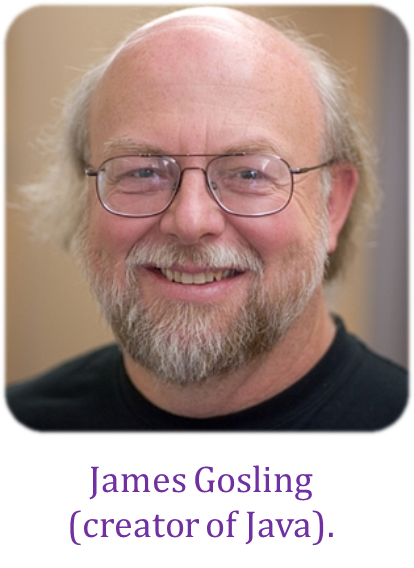
Project Duke
Duke, the Java Mascot
[credit: Wikipedia]
_waving.svg)
Project Duke is a educational software project designed to take you through the steps of building a small software incrementally, while applying as many Java and SE techniques as possible along the way.
The project aims to build a product named Duke, a Personal Assistant Chatbot that helps a person to keep track of various things. The name Duke was chosen as a placeholder name, in honor of Duke, the Java Mascot. You may give it any other name and personality you wish.
Here is a sample interaction with Duke:
    ____________________________________________________________
      ____        _
     |  _ \ _   _| | _____
     | | | | | | | |/ / _ \
     | |_| | |_| |   <  __/
     |____/ \__,_|_|\_\___|

     Hello! I'm Duke
     What can I do for you?
    ____________________________________________________________

list
    ____________________________________________________________
     Here are the tasks in your list:
     1.[T][✓] read book
     2.[D][✗] return book (by: June 6th)
     3.[E][✗] project meeting (at: Aug 6th 2-4pm)
     4.[T][✓] join sports club
    ____________________________________________________________

todo borrow book
    ____________________________________________________________
     Got it. I've added this task:
       [T][✗] borrow book
     Now you have 5 tasks in the list.
    ____________________________________________________________


deadline return book /by Sunday
    ____________________________________________________________
     Got it. I've added this task:
       [D][✗] return book (by: Sunday)
     Now you have 6 tasks in the list.
    ____________________________________________________________

done 2
    ____________________________________________________________
     Nice! I've marked this task as done:
       [D][✓] return book (by: June 6th)
    ____________________________________________________________

blah
    ____________________________________________________________
     ☹ OOPS!!! I'm sorry, but I don't know what that means :-(
    ____________________________________________________________

bye
    ____________________________________________________________
     Bye. Hope to see you again soon!
    ____________________________________________________________
The project consists of the following increments:
- Levels: A series of features, meant to be added to Duke in the given order, although some can be skipped. These have been named
Level 1toLevel 10to indicate how each makes the product progressively "level up". - Extensions:
- Category A These are internal/feature enhancements meant to help you practice a specific Java or an SE technique.
- Category B These are enhancements related to task tracking.
- Category C These are enhancements, not specifically related to task tracking.
- Category D Each of these adds the ability to track another type of entities.
The iP is to be done over the first half of the semester.
- Volatile requirements ahead!: Some requirements will only be released later (or could be changed along the way), to simulate how requirements of a project may not be available at the start or stay the same during the project.
- Requirements may differ between students!: Note that some requirements that are to be released later could be different from one student to another.
Admin iP - Grading
Total: 30 marks
Implementation [15 marks]: Requirements to get full marks:
- Achieve more than 90% of all deliverables by the end.
- Requirements marked as optional or if-applicable are not counted when calculating the percentage of deliverables.
- When a requirement specifies a
minimalversion of it, simply reaching that minimal version of the requirement is enough for it to be counted for grading -- however, we recommend you to go beyond the minimal; the farther you go, the more practice you will get.
- The code quality meets the following conditions:
- Reasonable use of OOP e.g., at least some use of inheritance, code divided into classes in a sensible way
- No blatant violations of the coding standard
- At least some errors are handled using exceptions
- At least half of public methods/classes have javadoc comments
- The code is neat e.g., no chunks of commented out code
- Reasonable use of SLAP e.g., no very-long methods or deeply nested code
Project Management [10 marks]: To get full marks, you should achieve,
- Submit some deliverables in at least 4 out of the 6 iP weeks (i.e., week 2 - week 7)
- Follow other requirements specified (e.g., how to use Git/Github for each increment, do peer reviews) in at least 4 weeks
Documentation [5 marks]: To get full marks, you should achieve,
- The product web site and the user guide is reasonable (i.e., functional, not hard to read, covers all features, no major formatting errors in the published view).
You can monitor your iP progress (as detected by our scripts) in the iP Progress Dashboard page.
2 Set up prerequisites
- Ensure you have followed the Preparation sections of the following module tools:
Admin Programming Language
 |
The main language used in this module is Java. You should use Java for all programming activities, the project, and exam answers. |
Preparation:
We require you to use Java 11 (the Oracle version or the OpenJDK version) for all module work. It is your duty to ensure the code you write (and executables you produce) are compatible with that version of Java. Any incompatibilities will be considered as bugs.
Admin Tools → Git
Tool: Git (for revision control)
You are required to use Git. Other revision control software are not allowed. The recommended GUI client for Git is SourceTree, but you may use any other, or none.
Preparation:
Install Git and a Git GUI client on your computer.
SourceTree comes bundled with Git i.e., if you install SourceTree, you get both Git and a GUI client in one shot. If you are already comfortable using Git command line, you need not install/use a GUI client.
Set Git user.name: We use various tools to analyze your code. For us to be able to identify your commits, we encourage you to set your Git user.name in all computers you use to a sensible string that uniquely identifies you. For example, you can set it to your GitHub username or your full name. If this user name is not set properly or if you use multiple usernames for Git, our grading scripts might miss some of your work.
After installing Git in a computer, you can set the Git username as follows:
- Open a command window that can run Git commands (e.g., Git bash window)
- Run the command
git config --global user.name YOUR_GITHUB_USERNAME(omit the--globalflag to limit the setting to the current repo only)
e.g.,git config --global user.name JohnDoe
More info about setting Git username is here.
Admin Tools → GitHub
Tool: GitHub (for code hosting)
You are required to use GitHub as the hosting and collaboration platform of your project (i.e., to hold the Code repository, Issue Tracker, etc.).
Preparation:
Create a GitHub account (if you don't have one yet), as explained in the panel below.
Admin Appendix E - GitHub: Creating an Account
Create a personal GitHub account if you don't have one yet.
-
You are advised to choose a sensible GitHub username as you are likely to use it for years to come in professional contexts e.g., in job applications.
-
Strongly recommended: Complete your GitHub profile. In particular,
- Specify your full name.
- Upload a profile photo that matches our requirements.
Why am I being encouraged to complete my GitHub profile?
The GitHub profile is useful for the tutors and classmates to identify you. If you are reluctant to share your info in your long-term GitHub account, you can remove those details after the module is over or create a separate GitHub account just for the module.
-
You are discouraged from changing your GitHub username during the semester/exam/grading period as it can cause our auto-grading scripts to miss your GitHub activities. If you do change your GitHub username during that period, please let us know immediately.
The purpose of the profile photo is for the reader to identify you. Therefore, choose a recent individual photo showing your face clearly (i.e., not too small) -- somewhat similar to a passport photo. Given below are some examples of good and bad profile photos.
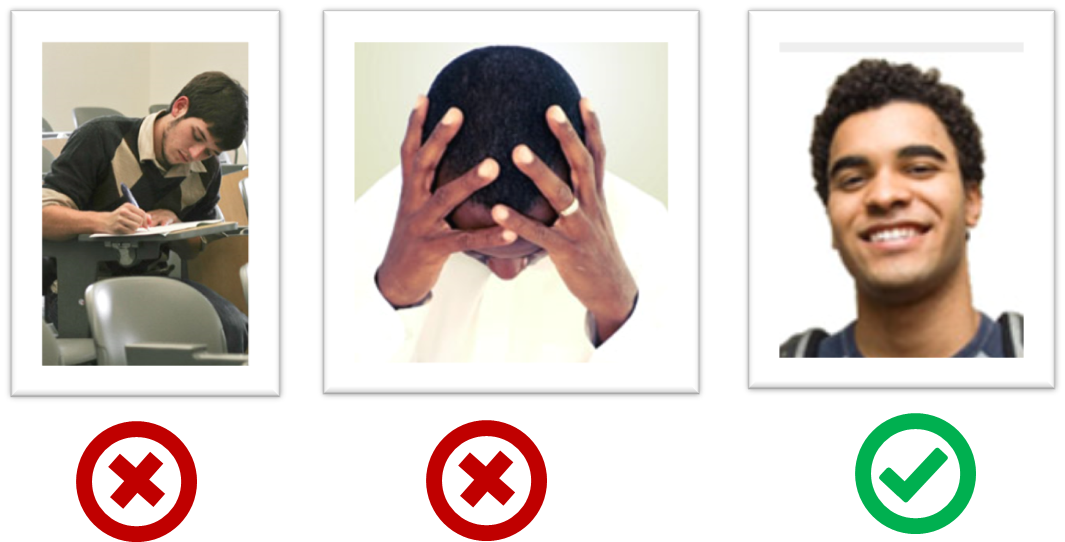
If you are uncomfortable posting your photo due to security reasons, you can post a lower resolution image so that it is hard for someone to misuse that image for fraudulent purposes. If you are concerned about privacy, you may use a placeholder image in place of the photo in module-related documents that are publicly visible.
More info: See Appendix E - Using GitHub.
Admin Tools → Intellij IDEA
Tool: Intellij IDE
You are recommended to use Intellij IDEA for module-related programming work. While the use of Intellij is not compulsory, note that module materials are optimized for Intellij. Use other IDEs at your own risk.
Preparation:
- Install the IDE in your computer. You may use the Intellij community edition (free) or the ultimate edition (free for students).
- If you have an older version of the IDE, we recommend updating to the latest version.
3 Set up the project in your computer
- Read through this week's topics before starting the project.
- Fork https://github.com/nus-tic4001-AY2021S1/ip.
- Enable the issue tracker of your fork (Go to
Settingsof your fork, scroll to theFeaturessection, and tick theIssuescheckbox). Reason: at times we post feedback on your issue tracker.
If the issue tracker is enabled, you should be able to visit the following URLhttps://github.com/{your_user_name}/ip/issuese.g.,https://github.com/johnDoe/ip/issues - Clone the fork onto your computer.
- Set up the project in your IDE as explained in the README file.
4 Add Increments (+ commit, tag, push): Level-0, Level-1, Level-2, Level-3 before next lecture
- From this point onward, commit code at important points. Minimally, commit after completing each increment.
Level-0: Greet Level 0. Greet
Implement an initial skeletal version of the Duke that simply greets the user and exits.
Example:
____________________________________________________________
 Hello! I'm Duke
 What can I do for you?
____________________________________________________________
 Bye. Hope to see you again soon!
____________________________________________________________
- The indentation and horizontal lines are optional.
Level-1: Greet, Echo, Exit Level 1. Greet, Echo, Exit
Implement a skeletal version of Duke that starts by greeting the user, simply echos commands entered by the user, and exits when the user types bye.
Example:
    ____________________________________________________________
     Hello! I'm Duke
     What can I do for you?
    ____________________________________________________________

list
    ____________________________________________________________
     list
    ____________________________________________________________

blah
    ____________________________________________________________
     blah
    ____________________________________________________________

bye
    ____________________________________________________________
     Bye. Hope to see you again soon!
    ____________________________________________________________
- The indentation and horizontal lines are optional.
You are strongly encouraged to customize the chatbot name, command/display formats, and even the personality of the chatbot to make your chatbot unique.
Level-2: Add, List Level 2. Add, List
Add the ability to store whatever text entered by the user and display them back to the user when requested.
Example:
    ____________________________________________________________
     Hello! I'm Duke
     What can I do for you?
    ____________________________________________________________

read book
    ____________________________________________________________
     added: read book
    ____________________________________________________________

return book
    ____________________________________________________________
     added: return book
    ____________________________________________________________

list
    ____________________________________________________________
     1. read book
     2. return book
    ____________________________________________________________
bye
    ____________________________________________________________
     Bye. Hope to see you again soon!
    ____________________________________________________________
- There is no need to save the data to the hard disk.
- Assume there will be no more than 100 tasks. If you wish, you may use a fixed size array (e.g.,
String[100]) to store the items.
Level-3: Mark as Done Level 3. Mark as Done
Add the ability to mark tasks as done.
list
    ____________________________________________________________
     Here are the tasks in your list:
     1.[✓] read book
     2.[✗] return book
     3.[✗] buy bread
    ____________________________________________________________

done 2
    ____________________________________________________________
     Nice! I've marked this task as done:
       [✓] return book
    ____________________________________________________________
When implementing this feature, you are also recommended to implement the following extension:
Extension: A-Classes
While it is possible to represent a task list as a multi-dimensional array containing String, int, boolean etc.primitive values, the more natural approach is to use a Task class to represent tasks.
Partial solution
public class Task {
    protected String description;
    protected boolean isDone;

    public Task(String description) {
        this.description = description;
        this.isDone = false;
    }

    public String getStatusIcon() {
        return (isDone ? "\u2713" : "\u2718"); //return tick or X symbols
    }

    //...
}
Task t = new Taks("read book");
t.markAsDone()